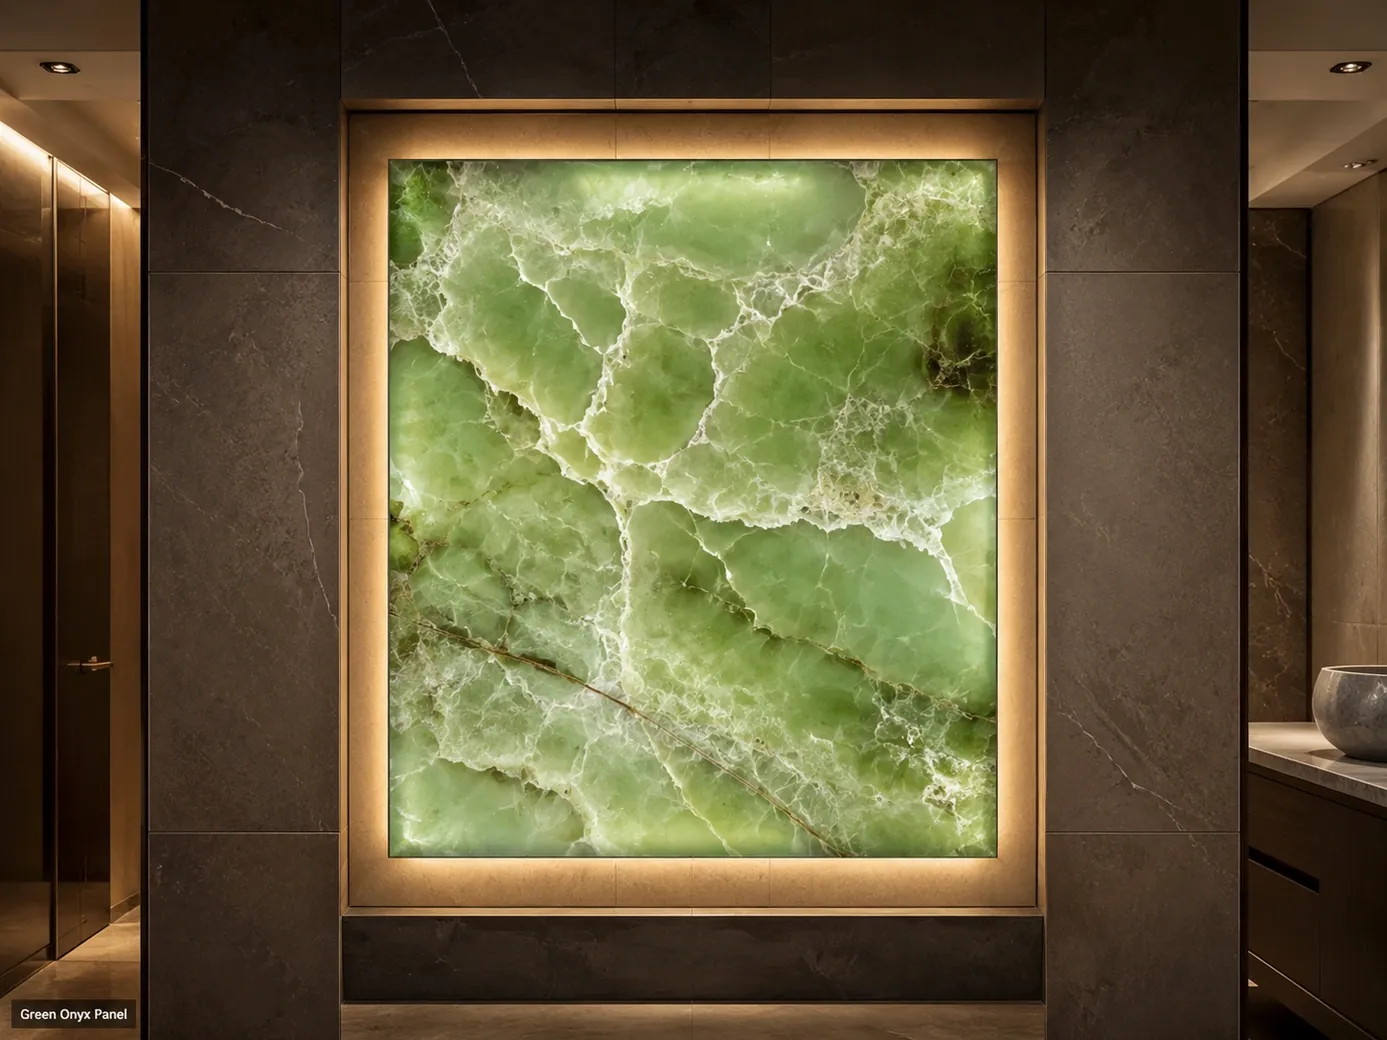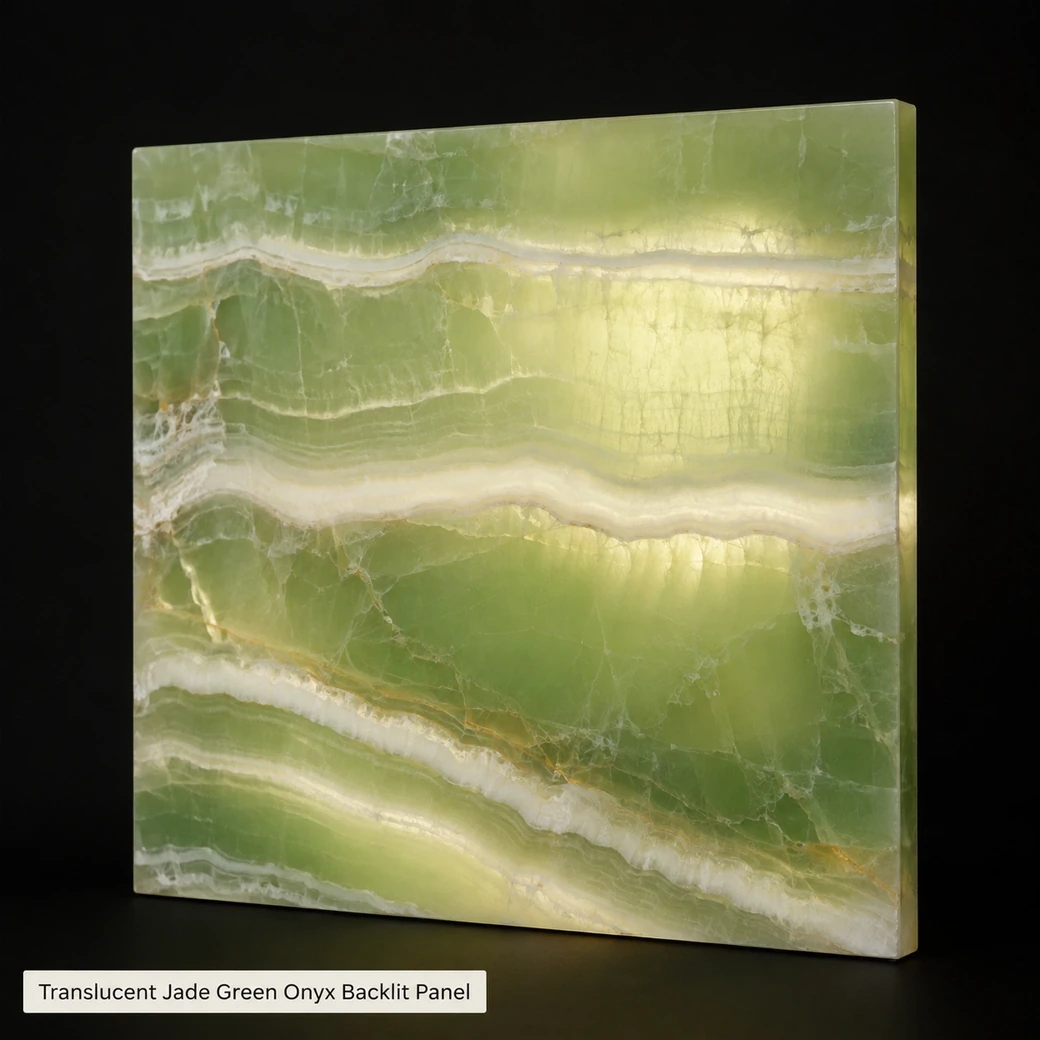
Backlit onyx works because its calcite structure can transmit light through thinner sections. Conventional panels are often 10–20 mm, while laminated systems may use only about 5 mm of onyx bonded to glass. LED temperature should be tested against the actual slab; warm onyx often benefits from 2700–3000K, while neutral/cooler stone may suit roughly 4000K+. Onyx with light is widely used for bars, reception desks, feature walls and luxury bathrooms.
Illuminated Onyx Surfaces
Backlit Onyx Panel Small
Secure product inquiry
Buy now
Cash on delivery available. Product details are pre-filled below. Owner delivery adds AED 5,000.
LED Tone, Backing & Access
Engineering an Even Glow Behind Natural Stone
This 60 × 60 × 1.5 cm jade-green onyx panel should be designed together with its lighting cavity rather than treated as stone installed first and illuminated later. LED sheets or closely spaced modules help avoid visible hotspots, while driver access and ventilation should remain serviceable. Glass or honeycomb lamination can also improve strength where thinner translucent stone is required.
Translucent Stone Engineering
Natural Onyx Backlit Wall Panel Construction
A Natural Onyx Backlit Wall Panel uses translucent Green Calcite Onyx whose polished jade-green surface and white bands become more pronounced when illumination passes through the stone. A full natural-stone panel preserves the depth, fissures and individual vein movement of the slab, while laminated systems bond a thinner layer of genuine onyx to glass or another structural backing to reduce weight and improve support. Resin onyx-look panels may imitate translucency and color but do not reproduce the mineral structure or natural variation of calcite onyx, making material identification important when specifying illuminated architectural features.
Light, Thickness & Backing
LED Onyx Panel Design for Even Illumination
The 60 × 60 × 1.5 cm Green Onyx panel weighs 14.6 kg, so even illumination depends on planning the entire light box rather than simply placing LEDs behind the stone. The 15 mm translucent stone needs a cavity deep enough to diffuse individual LED points, while glass or honeycomb backing can improve stiffness and handling; panel support, backing transparency and light-source spacing should all be tested with the actual slab before installation.
Translucent Onyx Panel Lighting Color
Test the actual jade-green panel under different LEDs; warmer 2700–3000K light softens mineral tones, while roughly 4000K gives a more neutral presentation.
Natural Onyx Light Wall Lamination
A rigid translucent or engineered backing should support the 15 mm onyx evenly while allowing light transmission without visible point pressure on natural fissures.
Backlit Onyx Reception Desk and Bar Panels
The 60 cm Green Onyx panel suits illuminated bars, reception fronts, feature walls and luxury bathroom details where controlled backlighting can reveal its translucent bands.
Product Overview
Green Backlit Onyx Wall Details
This Green Onyx panel uses polished translucent calcite onyx with jade-green colouring and white bands, measuring 60 × 60 × 1.5 cm and weighing 14.6 kg. Backlighting is supported, but the exact backing, LED system, cavity depth and installation assembly are not specified in the supplied data.
| Luminous Uniformity | Target luminous uniformity: Emin/Eavg ≥0.85 across LED field, excluding natural stone variation |
|---|---|
| LED Pitch | Approx. 50 mm center-to-center diffused LED-module grid pitch, confirmed by full-size illumination mock-up |
| Diffuser Material | 3 mm opal-white cast acrylic diffuser with approximately 40–50% light transmission |
| Lighting Cavity Depth | Minimum 75 mm clear lighting-cavity depth between the diffuser and rear of the onyx |
| Driver Access | Removable side or lower access panel providing at least 150 × 150 mm clear service access to the LED driver |
| Ventilation Gap | Minimum 20 mm continuous ventilation opening at the top and bottom of the lighting enclosure |
| Dimming Protocol | DALI-2 dimming with 1–100% control; 0–10 V option available where required by the project lighting system |
| Electrical Load | Approx. 12–15 W/m² LED connected load, excluding driver losses; final wattage calculated from the approved module layout |
| Panel Joint Illumination Detail | Maintain the LED array and diffuser continuously behind panel joints, with no framing member directly blocking the illuminated seam |
| Service Access Method | Demountable lower or side trim providing tool-accessible entry to drivers, connectors and replaceable LED modules |
Serviceability
Maintaining an Onyx Light Panel Installation
The lighting enclosure should retain removable access to LED modules and drivers, with ventilation sufficient to control heat and avoid shortened component life. Maintain consistent LED spacing and diffusion to prevent hotspots, clean polished onyx gently and approve the colour temperature because warm and cool light can substantially change the apparent stone colour.
Lighting Performance
Why Choose a Translucent Jade Onyx Panel
A translucent jade onyx panel offers four technical advantages: the stone can transmit light through thinner sections, LED colour temperature can be tuned to the slab, laminated systems can reduce stone thickness and weight, and the illuminated surface can serve simultaneously as cladding and decorative lighting. These qualities suit reception desks, bars, feature walls and luxury bathroom installations.
- Natural Light Transmission
Natural calcite translucency allows light to pass through the jade-green stone and reveal internal white mineral bands.
- Bookmatch Design Potential
Matching onyx panels can be arranged symmetrically to create mirrored bookmatch patterns across illuminated feature walls.
- Even LED Illumination
Correct LED spacing and diffusion can create more even illumination across the translucent onyx without obvious light hotspots.
- Bespoke Cut Sizes
Panels can be precision cut to bespoke wall, bar, desk or feature dimensions before integration with the LED lighting system.
Project Engineering
Custom Backlit Onyx Feature Wall Options
A custom backlit onyx wall should begin with cut-to-size panel planning and slab selection for bookmatched or sequential vein layouts, followed by a backing system capable of supporting the translucent stone. LED colour temperature should be tested against the actual Green Onyx, while driver access, ventilation, joints and removable service zones must be coordinated before architectural installation; the same need for precise detailing applies to a bespoke flagstone countertop.

Technical Reference
Illuminated Natural Onyx Panel Specifications
Use the illuminated-panel specifications to coordinate translucency, backing construction, LED system and service access before installation. The colour-temperature field should be reviewed against the selected stone so lighting can be tested for the actual visual result rather than chosen independently.
Product details
Specifications, care, delivery and FAQ
Everything is rendered from product JSON fields so the page remains SEO-ready even before JavaScript runs.
Cleaning: Switch off and cool the lighting system, dust polished onyx with microfiber, wipe using a barely damp pH-neutral stone-cleaner cloth, dry immediately to prevent streaks, keep moisture away from joints LEDs and wiring, avoid acids abrasives solvents and concentrated heat
Daily Care: Switch off lighting before dusting, wipe polished onyx with clean microfiber, remove fingerprints using a barely damp pH-neutral cleaner cloth, dry immediately, keep joints LEDs and ventilation clear, avoid acids abrasives solvents impact and concentrated heat
- Avoid concentrated LED heat
- avoid spraying cleaner into joints or lighting components
- avoid acidic or abrasive cleaners
- avoid impact on thin translucent areas
- avoid servicing the backlight while energized
Maintenance: Switch off lighting before care, dust polished onyx with microfiber, wipe fingerprints using a barely damp pH-neutral cleaner cloth, keep joints and LEDs dry, maintain rear ventilation, inspect supports wiring and heat distribution periodically
Handling: Switch off and disconnect lighting first, use multiple handlers and a full rigid support frame, carry the panel vertically, protect translucent edges and wiring, use compatible suction lifters, never flex or lift from LED channels
How far should the LED source sit behind this 15 mm Green Onyx panel, and should a diffuser be added, to produce even illumination without visible bright spots or LED lines?
For a 15 mm Green Onyx panel, start with approximately 75–150 mm between the stone and LED plane, depending on LED density and the available cavity. Install high-density LED modules or strips across the entire back, not only at the perimeter, and add a translucent diffuser when testing shows dots or lines. Use a reflective white cavity, dimmable drivers and accessible ventilation. Build a full-size illuminated mock-up from the selected panel because darker veins and varying translucency can require local LED-spacing adjustments.
Does this translucent onyx panel require an opal diffuser behind it to prevent visible LED hotspots and uneven illumination?
An opal diffuser is usually recommended because it blends individual LEDs and softens illumination through the 15 mm Green Onyx. Whether it is essential depends on LED density, cavity depth and natural opacity. Begin with LEDs approximately 75–150 mm behind the stone, use a reflective white cavity and add an opal acrylic layer if a full-size mock-up shows dots or strip lines. Very shallow cavities require denser LEDs and stronger diffusion. Drivers need ventilation, dimming control and accessible replacement routes.
How should warm, neutral and cool LED colour temperatures be tested behind the actual green onyx slab before final selection?
Build full-size samples from the actual green onyx offcut using the proposed diffuser, cavity depth and LED system. Compare warm 2700–3000 K, neutral 3500–4000 K and cool 5000 K lighting at several dimming levels; select only after assessing stone colour, hotspot visibility and the room’s surrounding finishes.
Where should LED drivers and electrical connections be positioned around the Backlit Onyx Panel so they remain ventilated and accessible for replacement without removing the stone?
Install the LED drivers in a ventilated, removable access compartment beside, above or below the Backlit Onyx Panel rather than directly behind the permanently fixed stone. Low-voltage cables can run through concealed conduits to the LED array, while plug-in connectors, fuses and drivers should remain reachable through a discreet cabinet door or magnetic access panel; allow the clearances specified by the driver manufacturer and never bury heat-producing components in adhesive or an unventilated wall cavity.
How should ventilation, heat dissipation and accessible driver placement be designed behind a backlit onyx panel to prevent overheating and uneven illumination?
Create a ventilated cavity with cool-air entry below and warm-air exit above, using low-heat dimmable LEDs mounted on aluminium heat-dissipation profiles. Keep drivers outside the hottest enclosed area in accessible service compartments, maintain even LED-to-diffuser distance and include temperature protection; structural support and wiring access should not require removing or stressing the onyx.
Reviews
Reviews and new review submission
0.0 average rating from 0 reviews. New reviews are saved as pending until approved.
No approved reviews yet for this product. The review form is ready for buyer submissions.